I still remember the first time I tried grooming my dog at home. I had a pair of cheap scissors, no plan, and a very unimpressed Shih Tzu staring back at me. Twenty minutes later, the floor looked like a fur explosion, my dog looked lopsided, and I had three small bandages on my fingers.
That was years ago. Today, I groom at home every single month, saving over $1,000 a year in grooming bills, and more importantly, my dog actually enjoys the process now. No more anxiety in the car ride to the salon. No more waiting in a cage for three hours. Just the two of us, the right tools, and a routine that works.
This complete guide is everything I wish someone had handed me at the beginning — a real, honest, experience-based walkthrough of grooming your dog at home, covering every coat type, every key technique, and every mistake I made so you don’t have to.
Why Grooming Your Dog at Home Saves Money, Time, and Stress

Before we get into the how, let me make the case for the why — because a lot of pet owners assume professional grooming is always the better option. It isn’t always.
- The cost savings are real. Professional dog grooming in the US costs anywhere from $50 to $150 per session depending on breed and coat. For dogs that need grooming every 4-6 weeks, that’s $600 to $1,800 per year. Learning to groom at home cuts that cost dramatically, even after buying quality tools.
- Your dog is less stressed. Most dogs experience anxiety at the grooming salon — unfamiliar smells, strange hands, loud dryers, and long wait times in a crate. Home dog grooming eliminates all of that. Your dog is in a familiar environment, with someone they trust, at their own pace.
- You catch health issues earlier. When you’re the one regularly running your hands through your dog’s coat, checking their ears, and trimming their paws, you notice things. Lumps, skin irritation, ear odor, overgrown dewclaws — these are things groomers might catch but you’ll catch faster when you’re doing it yourself every few weeks.
- It strengthens your bond. Regular grooming is physical touch, focused attention, and calm one-on-one time. Dogs respond to this profoundly, especially puppies being introduced to grooming early.
What Dog Grooming Tools do I Need? The Home Grooming Kit
You don’t need a professional setup to achieve great results. You need the right tools for your dog’s specific coat type. Here’s a breakdown of the essentials.
Universal Tools (Every Dog Needs These)
- Slicker brush — The workhorse of any grooming kit. The fine wire pins penetrate the topcoat and remove loose fur, debris, and small tangles. Works on almost every coat type.
- Metal greyhound comb — Used after brushing to check for any remaining tangles and to finish the coat. If the comb passes through smoothly from root to tip, the coat is tangle-free.
- Dog nail clippers or nail grinder — Nail trimming is non-negotiable for your dog’s joint and posture health. Choosing between a nail grinder vs clipper depends on your dog’s tolerance and your confidence level. Grinders are gentler for beginners.
- Dog-specific shampoo — Never use human shampoo. The pH levels are completely different and human shampoo disrupts your dog’s skin barrier. For dogs with sensitive skin, a natural dog shampoo or DIY dog shampoo made from gentle ingredients is the kindest option.
- Ear cleaning solution — Ears need regular maintenance to prevent infection. A simple cotton ball and a vet-approved ear cleaner is all you need.
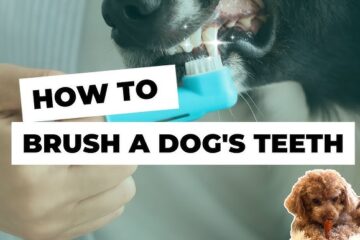
- Dog toothbrush and enzymatic toothpaste — Dental health is part of grooming. Enzymatic toothpaste breaks down plaque without brushing action, making this easier than it sounds.
- Styptic powder — Essential if you accidentally cut the quick during nail trimming. Stops bleeding immediately.
Coat-Specific Tools
For double-coated breeds (Huskies, German Shepherds, Golden Retrievers, Corgis): An undercoat rake and a de-shedding tool are non-negotiable. These breeds have a dense undercoat that slicker brushes alone can’t fully penetrate. Without proper de-shedding tools, you’re only brushing the surface.
For curly and wavy coats (Poodles, Doodles, Bichon Frises): A pin brush alongside your slicker brush prevents breakage in curly coats. You’ll also need dog clippers with multiple guard lengths for regular trims between full grooms.
For long silky coats (Shih Tzus, Maltese, Yorkies, Cocker Spaniels): A detangling spray, a wide-tooth comb, and a finishing brush are essential. These coats mat quickly and need more frequent brushing than any other coat type.
For short smooth coats (Labradors, Beagles, Boxers, Dalmatians): A rubber curry brush or grooming mitt is often enough. These coats are low-maintenance but still shed and still need regular attention.
Understanding Your Dog’s Coat Type
This is the step most beginner home groomers skip — and it’s the reason they end up frustrated. Grooming techniques that work beautifully on one dog can damage another dog’s coat entirely.
The 5 Main Dog Coat Types
Double Coat
Long Silky Coat
Curly and Wavy Coat
Wire/Harsh Coat
Labrador Retriever, Boxer, Beagle, Dachshund, Dalmatian Characteristics: Lies flat, low-maintenance, sheds moderately to heavily Grooming frequency: Brush weekly, bathe every 4-8 weeks Key challenge: Shedding management
Golden Retriever, Husky, German Shepherd, Corgi, Samoyed Characteristics: Dense undercoat beneath a coarser topcoat Grooming frequency: Brush 2-3 times per week, full groom every 6-8 weeks Key challenge: Seasonal shedding (blowing coat), mat prevention near armpits and ears
Shih Tzu, Maltese, Yorkshire Terrier, Afghan Hound Characteristics: Fine, flowing, human-hair-like texture Grooming frequency: Brush daily, professional-style trim every 6-8 weeks Key challenge: Rapid mat formation, especially around collar, ears, and legs
Goldendoodle, Labradoodle, Bichon Frise, Portuguese Water Dog Characteristics: Dense curls or loose waves, low-shedding but high-maintenance Grooming frequency: Brush every 2-3 days, clip every 6-8 weeks Key challenge: Mat formation that can tighten against the skin if neglected
Border Terrier, Scottish Terrier, Airedale, Wirehaired Dachshund Characteristics: Rough, bristly outer coat Grooming frequency: Brush weekly, hand-strip or clip every 8-12 weeks Key challenge: Maintaining coat texture — clipping changes texture permanently in these breeds
How to Groom Your Dog at Home? — Step by Step
This is the full routine I follow for a thorough home groom. Not every step is needed every session — I’ll note which steps are part of a full groom versus a maintenance groom.
Dog Grooming Frequency By Coat Type
A dog’s grooming frequency largely depends on their coat type. Breeds with continuously growing or curly hair require professional appointments and daily brushing to prevent mats, while double-coated breeds need specialized deshedding treatments.
| Coat Type | Brushing | Bathing | Nail Trim | Ear Check | Full Groom |
|---|---|---|---|---|---|
| Short smooth | Weekly | Every 4-8 weeks | Every 3-4 weeks | Monthly | Every 8-12 weeks |
| Double coat | 2-3x per week | Every 4-6 weeks | Every 3-4 weeks | Monthly | Every 6-8 weeks |
| Long silky | Daily | Every 2-3 weeks | Every 3-4 weeks | Every 2 weeks | Every 6-8 weeks |
| Curly/wavy | Every 2-3 days | Every 3-4 weeks | Every 3-4 weeks | Every 2 weeks | Every 6-8 weeks |
| Wire/harsh | Weekly | Every 4-6 weeks | Every 3-4 weeks | Monthly | Every 8-12 weeks |
Common Home Dog Grooming Mistakes (And How to Avoid Them)
- Brushing without line brushing. Brushing the top of the coat while tangles form underneath is the most common mistake in long and double coats. Always brush in sections from the skin out.
- Skipping the brush before bathing. Wet mats become concrete. Always brush thoroughly before the bath.
- Using the wrong shampoo. Human shampoo, baby shampoo, dish soap — all disrupt your dog’s skin pH and cause irritation. Use a dog-specific product or a properly formulated DIY natural dog shampoo.
- Rushing. The single biggest cause of bad grooming experiences. If you’re short on time, do a maintenance brush rather than rushing a full groom. A rushed groom creates negative associations that make every future session harder.
- Cutting nails too short on the first attempt. Trim less than you think you need to. You can always trim again tomorrow. A quicked nail on the first attempt sets back your dog’s nail trimming tolerance significantly.
- Skipping grooming when the coat looks okay. Grooming isn’t just about appearance. A coat that looks okay on the surface can be harboring mats close to the skin. Run a comb through weekly regardless of how things look.
Is Home Dog Grooming Safe?
Yes — with the right tools, the right technique, and patience, home grooming is completely safe for your dog. The risks — accidental nail quicking, accidental skin nicks with scissors — are real but minor and manageable.
The more important safety question is: is your dog comfortable? A dog who is panicking, snapping, or in distress during grooming is a dog at risk of injury — to themselves and to you. If your dog has extreme grooming anxiety — especially around bath time — start with desensitization techniques for dogs that hate water before jumping into a full groom. Short positive sessions, high-value treats, and building up gradually is the correct approach.
For dogs rescued from difficult backgrounds who are scared of being touched, see my guide on grooming a rescue dog that’s scared of touch.
Grooming Your Dog at Home Journey Starts Today
The first time will not be perfect. The second time will be better. By the fifth or sixth groom, you’ll have a routine that works for both you and your dog, and you’ll wonder why you ever paid someone else to do it.
Everything in this guide — every technique, every tool recommendation, every breed-specific tip — comes from real grooming sessions with real dogs, including plenty of sessions that didn’t go as planned.
The breed-specific guides linked throughout this article go deeper on each individual coat type and grooming need. The natural and DIY articles give you cleaner, gentler alternatives to commercial products. And the technique guides walk you through the steps that beginners find most intimidating, one at a time.
Start with your dog’s biggest need right now. Is it the nails that have gotten too long? Start there. Is it the mats forming behind the ears? That guide about home dog grooming waiting for you. Is it a full bath and brush that’s weeks overdue? You have everything you need right here.
Your dog is waiting. And this time, you’re ready.