You followed the diagram exactly (apples of the cheeks, blend up) and in the mirror it still looked wrong. The colour sat too low, or too far out, and instead of a fresh flush your face looked longer or wider than before you started. That gap is rarely about the shade.
Knowing how to apply blush for your face shape is about placement: small shifts in where the colour sits change the visual effect, so you adjust in the mirror until it works with your bone structure rather than against it.
Quick Answer
Where you place blush depends on your face shape, apply it high on the cheekbones and blend upward toward the temples to lift and elongate round or long faces, or focus on the apples of the cheeks and diffuse outward to soften angular or heart-shaped features.
Blush Placement Is About Effect, Not Rules
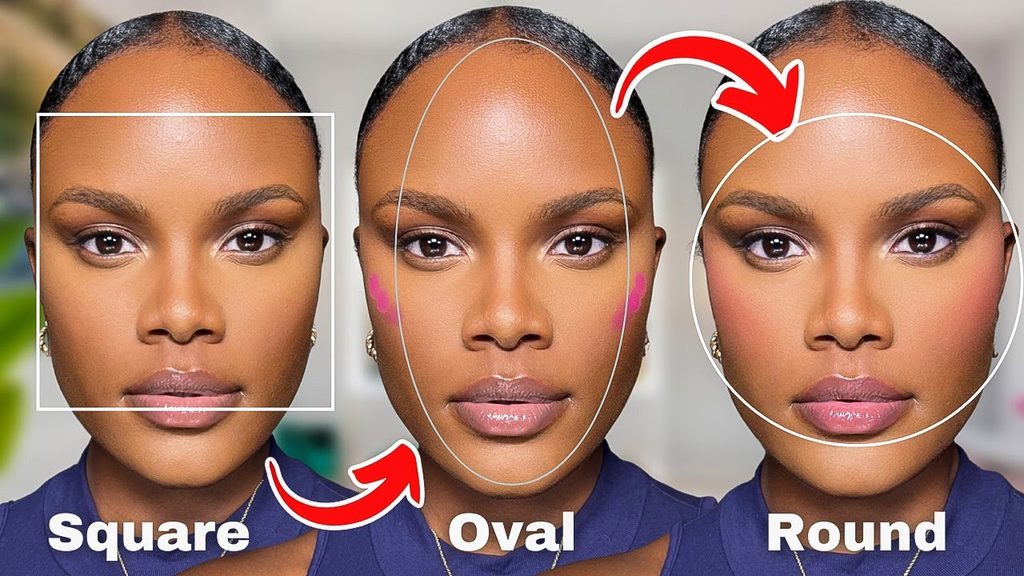
Every face-shape guide gives you a starting point, but the starting point is not the point. What matters is the effect you want: lift, softness, width or balance. Higher placement and an upward blend tend to lift, centred and rounded colour tends to soften, and a horizontal sweep tends to widen.
Two landmarks keep every version honest:
- The apple of the cheek: the fullest part when you smile softly.
- The cheekbone ridge: it runs from near your ear toward the centre of your face.
Most good blush placement is a shift of that cheekbone line: higher, lower, more centred or more horizontal. Where to put blush depends on the effect you want today.
Smile softly to find the apples, then relax your face before you apply. Smiling lifts the apples, so colour placed on a smiling cheek lands lower once your face relaxes. For colour families by undertone, see our guide to blush colors for every skin tone.
How to Find Your Face Shape
Compare the width of your forehead, cheekbones and jaw, and compare your face’s length to its width. Then match it to the closest of these:
- Round: length and width are similar, with soft curves and full cheeks.
- Oval: slightly longer than wide, with balanced proportions and a softly rounded jaw.
- Square: forehead, cheekbones and jaw are of similar width, with a defined, angular jaw.
- Heart-shaped: widest at the forehead or temples, tapering to a narrower, sometimes pointed chin.
- Long or oblong: clearly longer than it is wide.
Many faces mix two shapes, so treat the category as a starting point. If you are unsure, begin with the apples and judge the effect in the mirror.
How to Apply Blush for Your Face Shape
Round Face: Lift vs Softness
A round face is close to equal in length and width, with soft curves and full cheeks. The usual goal is lift and definition, but that is a choice, not a law. Some days you may want the soft, youthful fullness that round cheeks already give you, and on those days the apples are exactly right. The mistake is drifting into one effect while aiming for the other.
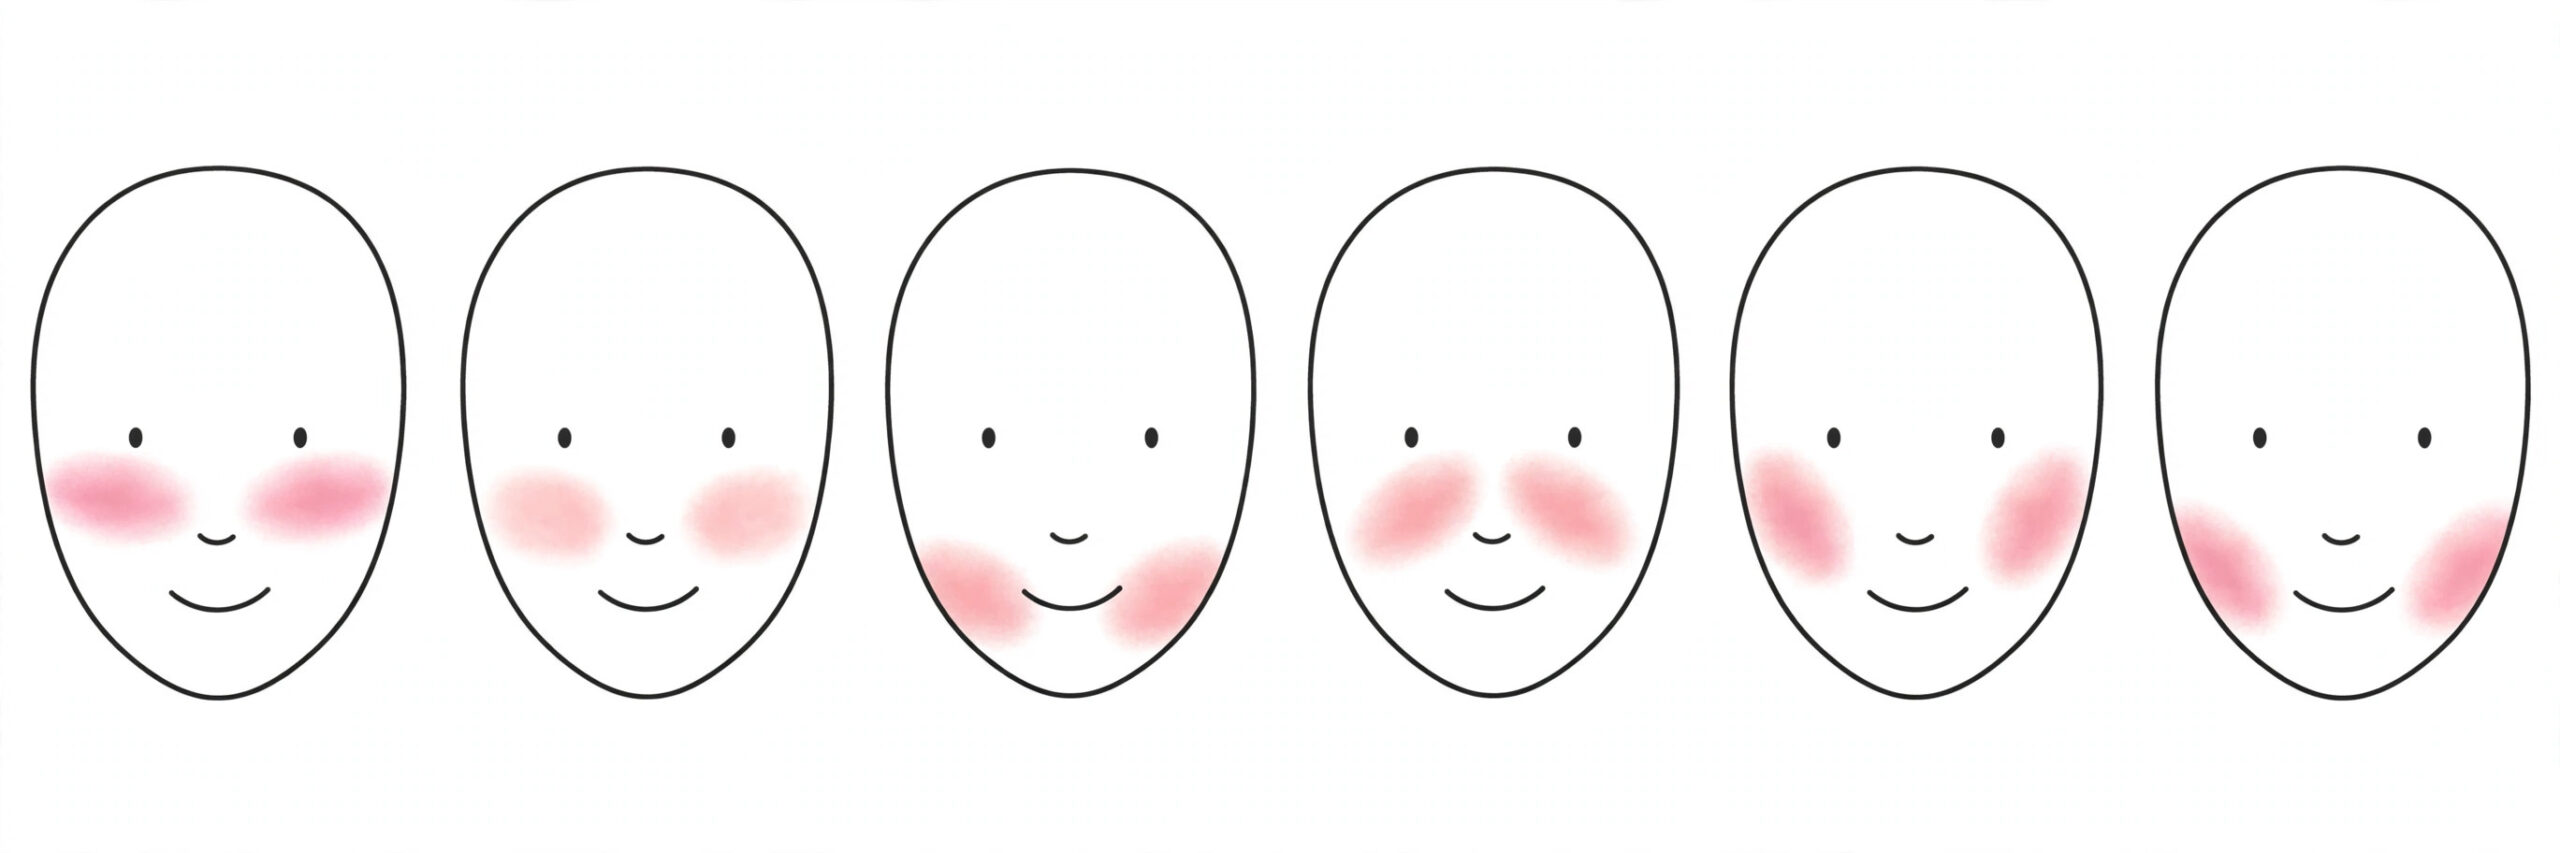
For lift, skip the roundest part of the cheek. Start just above the apples, on the upper cheekbone, and blend diagonally up toward the temples. A straight sweep along the bone adds the angle a round face naturally lacks.
- Start high, on the upper cheekbone.
- Keep the inner edge back, and stop well short of the nose.
- Blend toward the temple.
Oval Face
An oval face is slightly longer than it is wide, with balanced proportions. This is both good news and a trap: almost any placement looks acceptable, so it is easy to stop before it looks intentional.
For a sculpted look, sweep colour along the top of the cheekbone and blend back toward the temple. For a softer everyday flush, place colour on the apples and blend outward along the bone.
Avoid lengthening the face: no steep diagonal toward the hairline, and no colour dropped low on the cheek. Keep the sweep fairly level, on or just above the bone.
Square Face
A square face has a forehead, cheekbones and jawline of similar width, with a defined, angular jaw. The goal most people choose here is softening, so the jaw does not carry the whole look.
Place colour on the apples and work it in small, gentle circles, then blend outward toward the temples. Avoid sharp lines, hard edges and any sweep that follows the angle of the jaw. Blending does most of the work here, because a diffused edge reads as softness, while a visible stopping point reads as a stripe.
- Stay centred, with the strongest colour on the apples rather than near the hairline.
- Use small round motions, then a light outward feather to remove any edge.
Heart-Shaped Face
A heart-shaped face is widest at the forehead or temples and tapers to a narrower, sometimes pointed chin. Blush placed too high only adds to the top, while blush placed a little lower helps the lower half balance the upper half.
Start slightly lower than usual, on the lower cheekbone or just below the apples, and blend outward toward the ear or temple in a soft, open shape. That puts the weight of the colour in the mid-to-lower cheek rather than high on the bone. This is a balancing option, not a correction.
Avoid a high, tight sweep that hugs the top of the cheekbone and spotlights the widest points, and avoid dragging colour toward the jawline itself.
Long or Oblong Face
A long or oblong face is clearly longer than it is wide. The goal here is width: colour that travels across the cheek instead of up it, so the face reads shorter and broader.
Apply blush horizontally across the apples, extending gently outward toward the ears, and keep the blending horizontal too. The other long-face trap is height. Colour placed high on the cheekbone and blended toward the temple lifts, and lift on a long face reads as extra length. Keep the placement centred on the cheek, below the highest point of the cheekbone.
Quick Placement Chart
| Face shape | Start point | Blend direction | Avoid |
|---|---|---|---|
| Round | Just above the apples, on the upper cheekbone | Diagonally up toward the temples | Colour on the roundest part of the cheek; colour near the nose |
| Oval | Apples or tops of the cheekbones | Back along the cheekbone to the temple | Steep upward sweeps; colour dropped low on the cheek |
| Square | Apples of the cheeks | Small circles, then outward to the temples | Sharp lines, angular sweeps and hard edges |
| Heart-shaped | Lower cheekbone or just below the apples | Outward toward the ear or temple | High, tight sweeps on top of the cheekbone |
| Long or oblong | Apples of the cheeks | Horizontally outward toward the ears | Vertical blending; steep upward sweeps |
Where to Apply Blush: High vs Low Placement
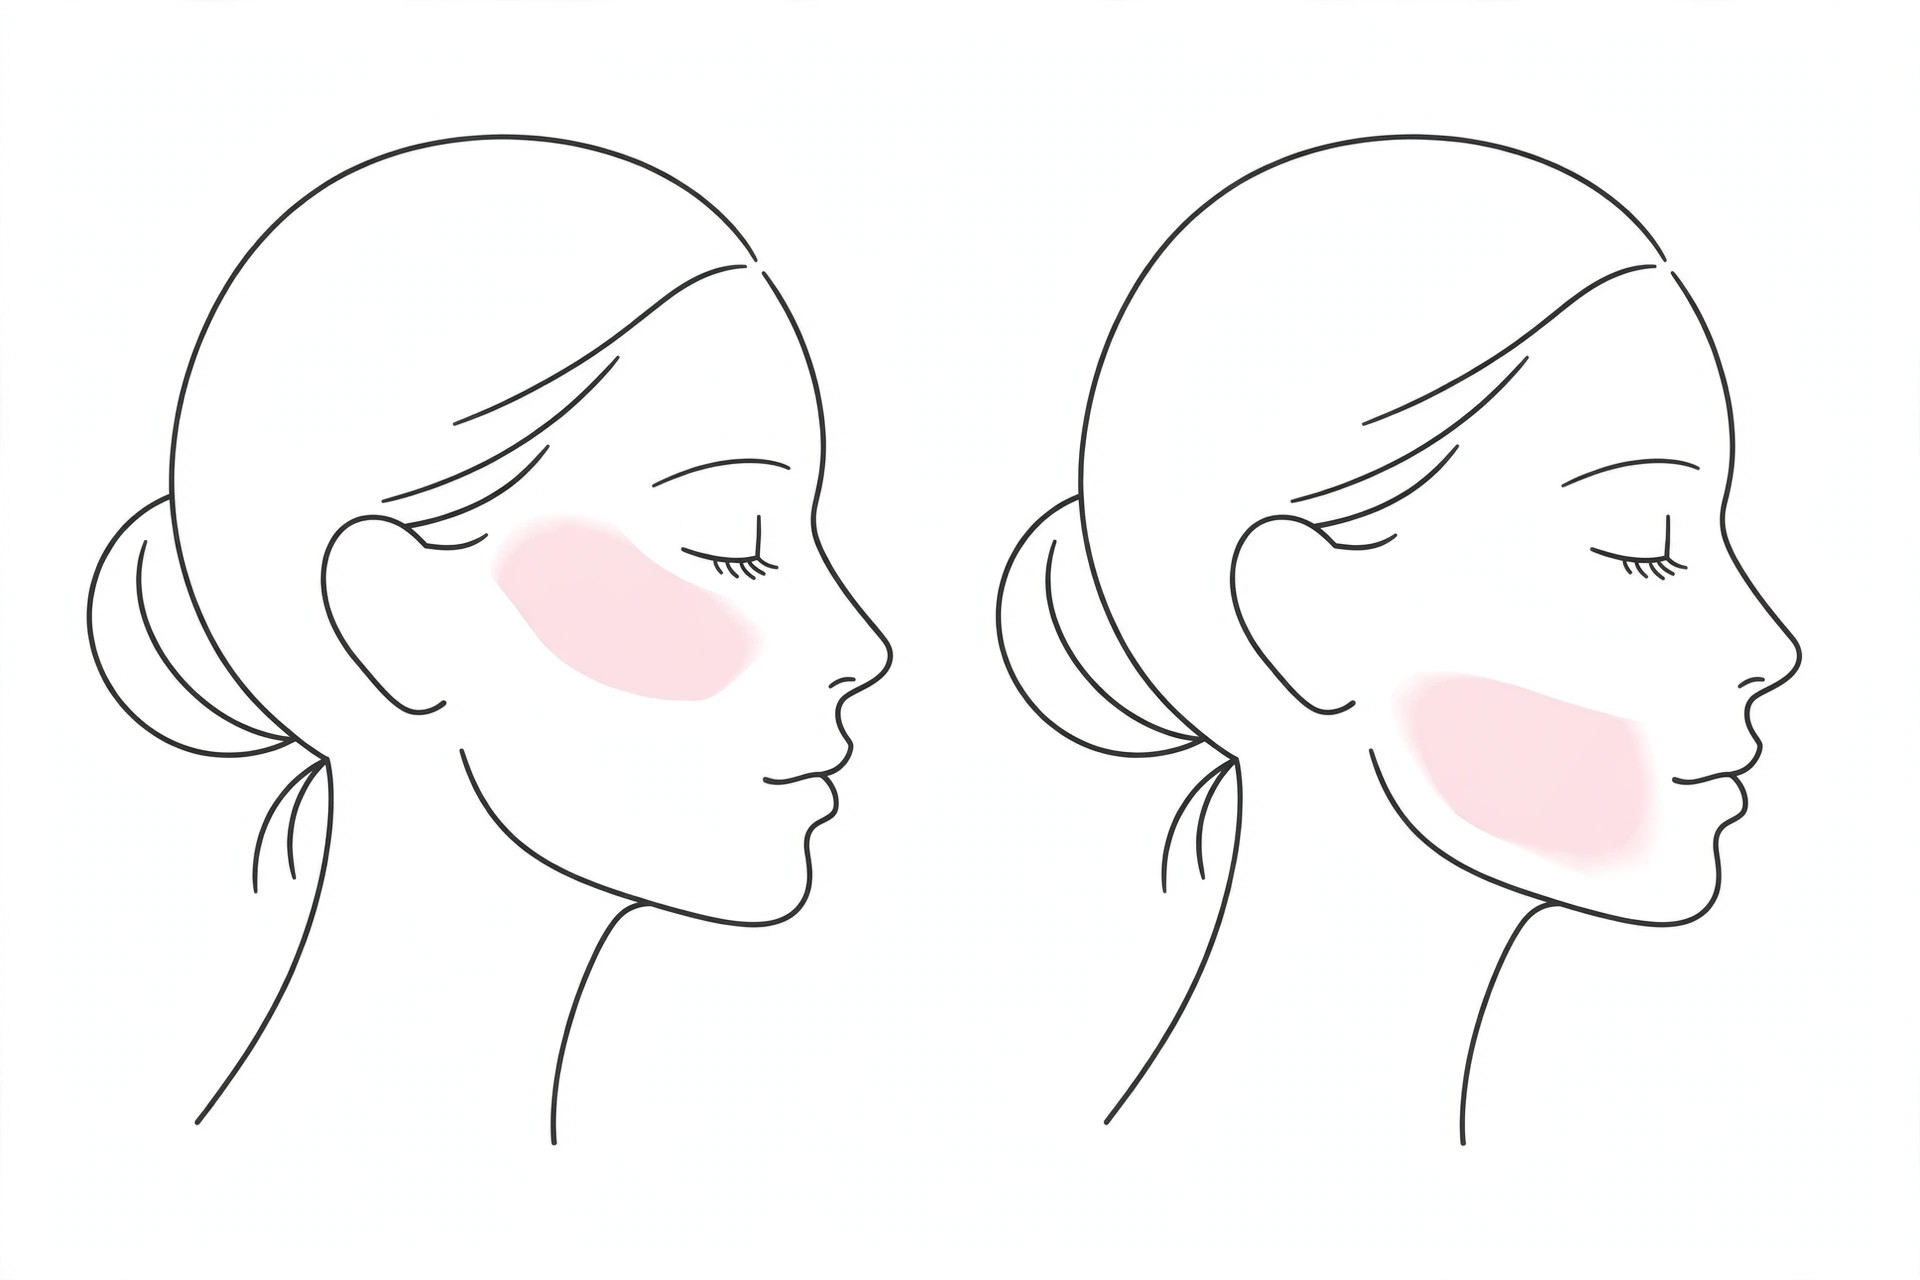
High and low placement are the two levers underneath every face-shape rule. High placement (on or above the cheekbone, blended toward the temple) lifts and defines.
Low placement (on or below the apples, blended outward) softens, widens and balances a narrow lower face. Neither is better. Each solves a different problem.
| Placement | Where the colour sits | Effect | Best for |
|---|---|---|---|
| High | On or above the cheekbone, blended to the temple | Lift and definition | Round faces, or anyone wanting a lifted look |
| Mid / apples | On the apples, blended outward along the bone | Soft, natural flush | Oval and square faces, and everyday wear |
| Low | Lower cheekbone or just below the apples, blended outward | Balance and width in the lower face | Heart-shaped faces |
| Horizontal | Across the apples toward the ears | Width and a shorter-looking face | Long or oblong faces |
| Too low (avoid) | Below the apples, toward the mouth or jaw | Drags the face downward | No face shape. Blend up or remove |
The lower limit matters most. Colour that drifts below the apples, toward the mouth or jaw, drags the face downward. This happens because the apples move when you smile, so colour placed on a smiling cheek lands lower once your face relaxes. Find your apples with a soft smile, then relax and check the placement.
How to Properly Apply Blush: Step by Step
Whether you are learning how to apply a blush with a brush or with your fingers, the steps are the same. Here is how to put blush on face in six steps:
- Start with a settled base. Applying blush over foundation or skincare that is still wet makes it patchy, so let the layers underneath set first.
- Find your apples. Smile softly, locate the fullest part of your cheek, then relax your face.
- Choose the right tool. Use a fluffy brush for powder. Use fingertips, a damp sponge or a dense brush for cream.
- Place a small amount at your chosen starting point. Tap off excess powder before it touches your face, or dot cream on and press it outward.
- Blend in the direction that serves your effect. Up for lift, outward for softness, horizontal for width. Build in thin layers, and stop when it looks natural.
- Check both cheeks in daylight. Compare the two sides before you add more.
Applying blush with a relaxed face and in thin layers is what keeps the colour where you meant it to go.
Cream vs Powder Blush
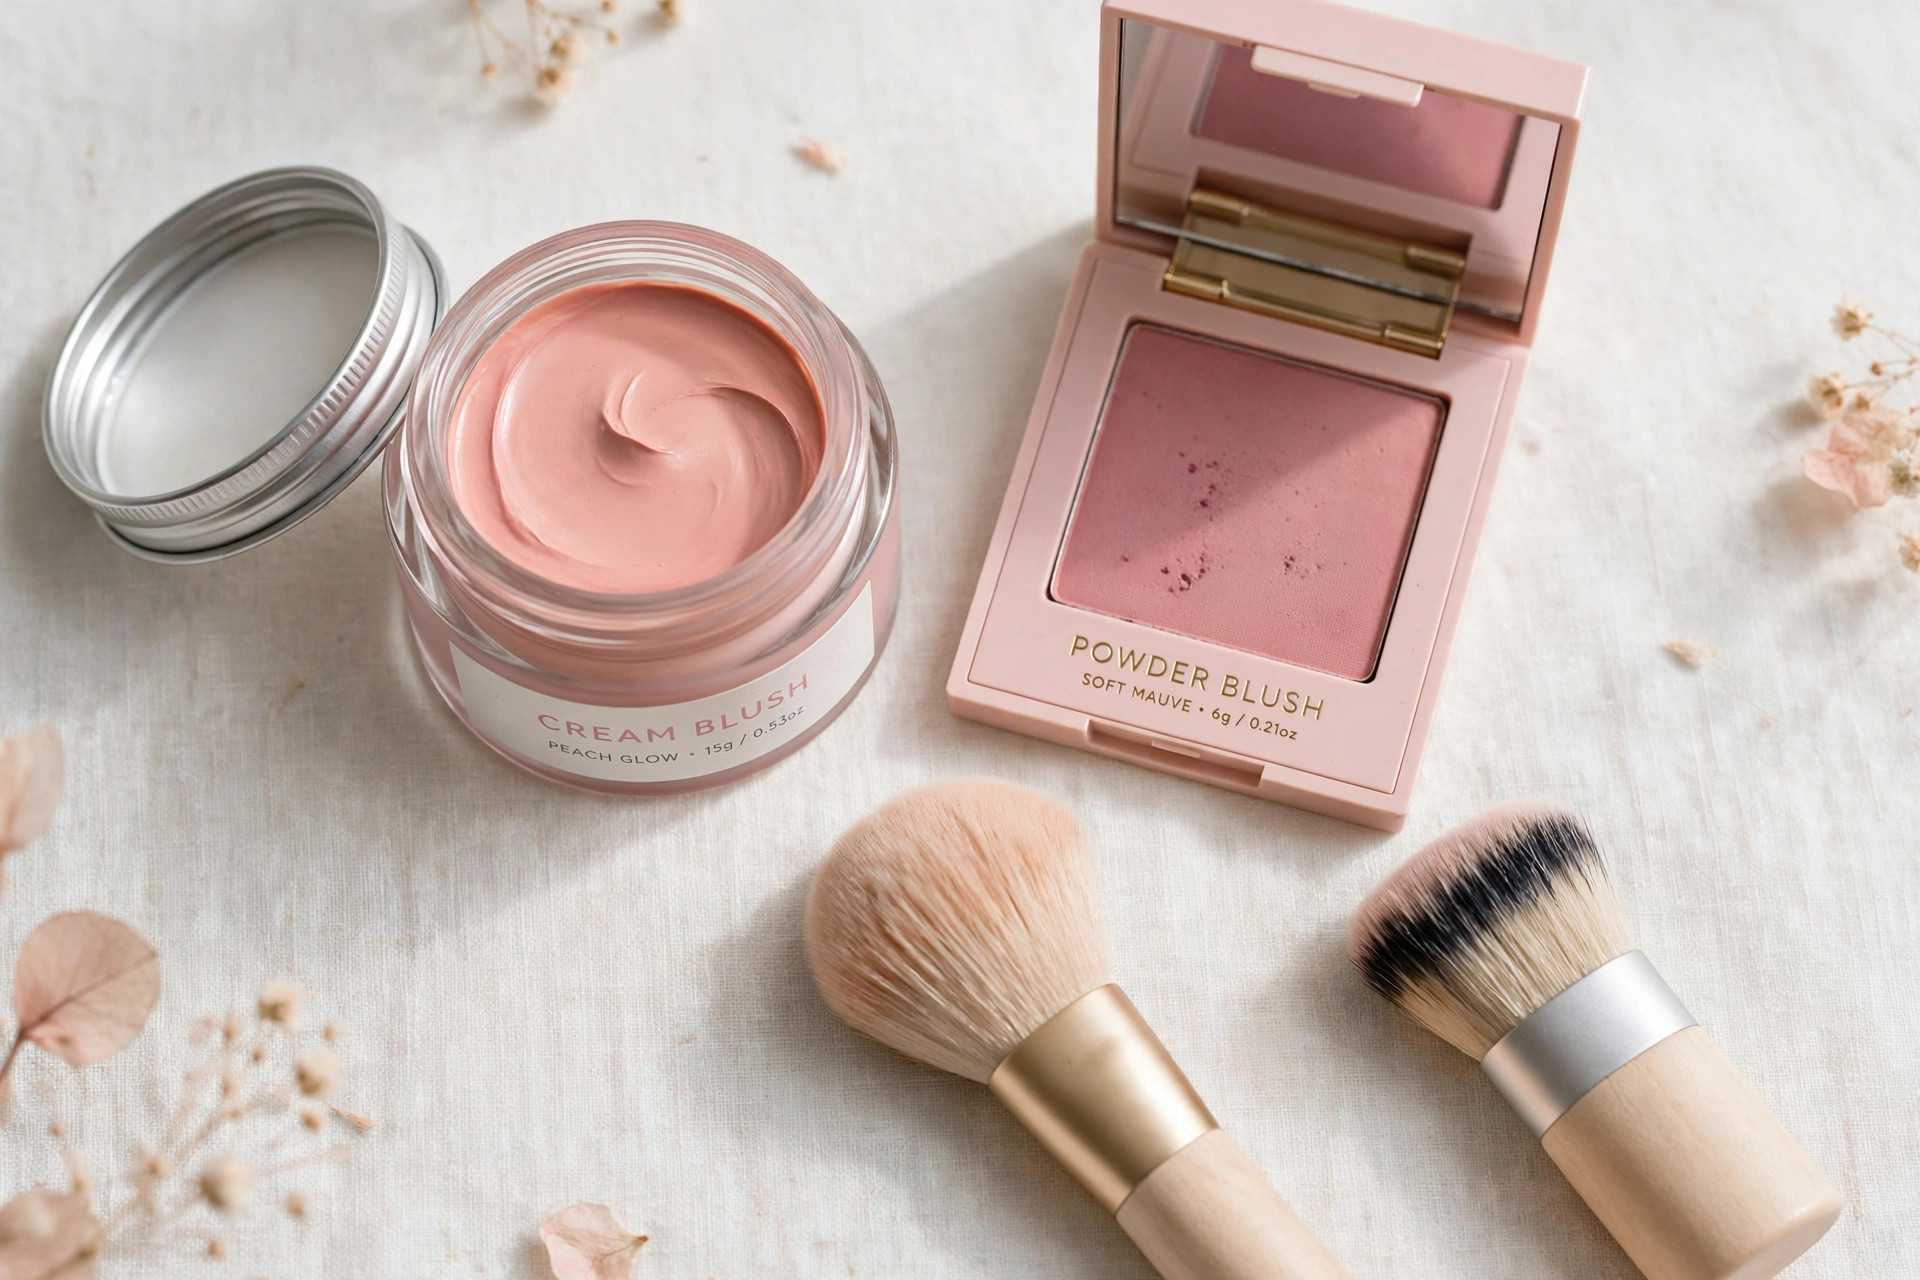
How to properly apply blush also depends on the formula. Placement rules do not change with formula, but the motion you use does.
Cream blush. Dot a small amount onto the cheek at your chosen placement point, then tap and press it outward with fingertips, a damp sponge or a dense brush. Work before any setting powder goes on, because cream over powder grabs unevenly and patches. Cream’s soft finish suits dry or normal skin and softening placements particularly well.
Powder blush. Tap excess off a fluffy brush before it touches your face, then sweep lightly in the direction you want the colour to fade, usually upward and outward. Build in thin layers.
Layering both. Apply cream first for depth, then a light matching powder on top to lock the placement in. Never put cream over a full layer of powder.
Blush and Bronzer Together
Blush and bronzer share the cheek, so their order and their boundary decide whether the face looks sculpted or muddy. A common order is bronzer first and blush second, though the best order depends on your formulas and the effect you want. Either way, the two should meet and not overlap into one brown-pink patch.
Apply bronzer around the perimeter first: the temples, hairline, jawline and the hollow beneath the cheekbone. Then place blush slightly above the bronzer, on the cheekbone or apples according to your face shape, and blend upward so the blush edge melts into the bronzer at the temples.
Two mistakes undo this:
- Putting blush in the hollow where bronzer belongs. It turns both products into one muddy stripe.
- Layering blush directly on top of a heavy bronzer patch. It dulls the blush colour.
If the boundary looks harsh, sweep a clean brush with no product lightly over the meeting point. That usually fixes it faster than adding more of either product. If the cheek looks muddy overall, reduce the product, check that the undertones match, and re-check the placement.
Frequently Asked Questions
Conclusion
Knowing how to apply blush for your face shape is not a diagram to memorise but a habit to build: name the effect you want, start on the cheekbone rather than in the hollow, blend in the direction that serves that effect, and check both cheeks in daylight before adding more.
Face shapes are starting points, and your own mirror has the final say. For the colour half of the equation, start with our blush colors for every skin tone guide and match your shade to your undertone first.
References
- Charlotte Tilbury, “How to Apply Blush to Suit Your Face Shape”: https://www.charlottetilbury.com/uk/secrets/how-to-apply-blush-to-suit-your-face-shape
- Ulta Beauty, “Where to Apply Blush for Your Face Shape”: https://www.ulta.com/discover/beauty-education/where-to-apply-blush-for-your-face-shape
- mindbodygreen, “How To Apply Blush According To Your Face Shape, From A Makeup Artist”: https://www.mindbodygreen.com/articles/how-to-apply-blush-for-your-face-shape