
Learning how to organize makeup is mostly about deciding what earns the front of the drawer and giving everything else a home further back. Picture opening that drawer tomorrow and seeing your daily five in a row, brushes upright in their cup, palettes standing like books. That change does not need a new vanity or a shopping spree. This guide walks through the decision, step by step, in one afternoon.
Quick Answer
Start by taking everything out and removing what you no longer use, then sort what is left into three zones: a small daily tray for what you reach for every morning, a weekly section for products you use a few times a week, and backstock for backups and occasion-only items. Measure your drawer or counter before buying any makeup organizers, group by product type inside each zone, and give your makeup bags a clear job. Finish with a 60-second reset you can actually repeat. The system that lasts is the one with the fewest steps between you and putting things back.
How to Organize Makeup: Declutter First
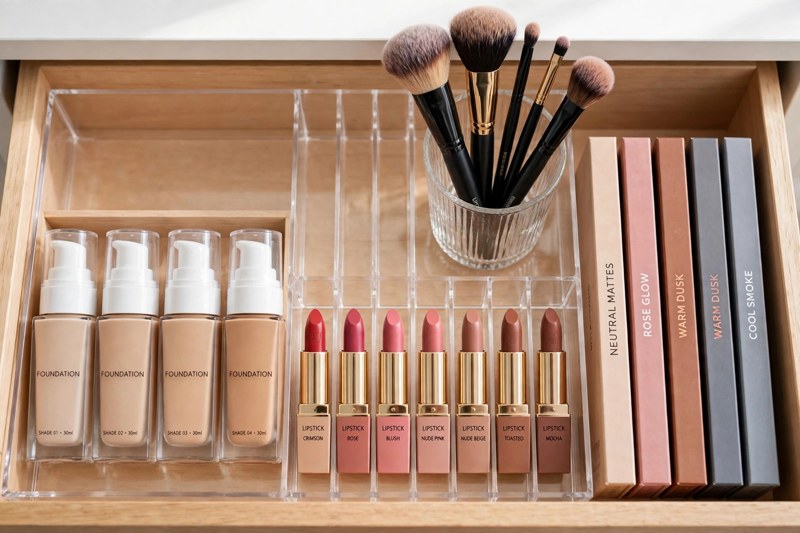
Do not buy a single organizer until you know what you own. Empty every drawer, bag, basket and countertop pile onto a clean surface, and look at the whole collection at once. A full inventory often reveals duplicates and seldom-used products.
Sort Into Four Piles: Keep, Put Away, Donate, Discard
Be honest about each pile:
- Keep: products you use regularly and enjoy, need for a specific occasion, or plan to finish.
- Put away: seasonal shades, backups and occasion-only products. These are not clutter. They just do not belong in the daily drawer.
- Donate: only unopened, unused products, and only to organizations that accept them. Never pass on used makeup. The American Academy of Dermatology (AAD) says not to share makeup that touches your skin or eyelashes.
- Discard: anything empty, broken, dried out, separated, or changed in smell, colour or texture. If you cannot remember when you opened it and it looks or smells off, let it go.
The hardest pile is usually the “maybe one day” group: the bold lipstick bought for an event that never happened, the palette kept out of guilt. Ask one question about each: would you reach for it this week if it were in front of you? If the answer is no, it goes in “put away” or “donate”, not back in the drawer.
Decluttering is not about owning less for its own sake. It is about making the drawer small enough that every item in it can be found in seconds.
Create Daily, Weekly and Backstock Zones
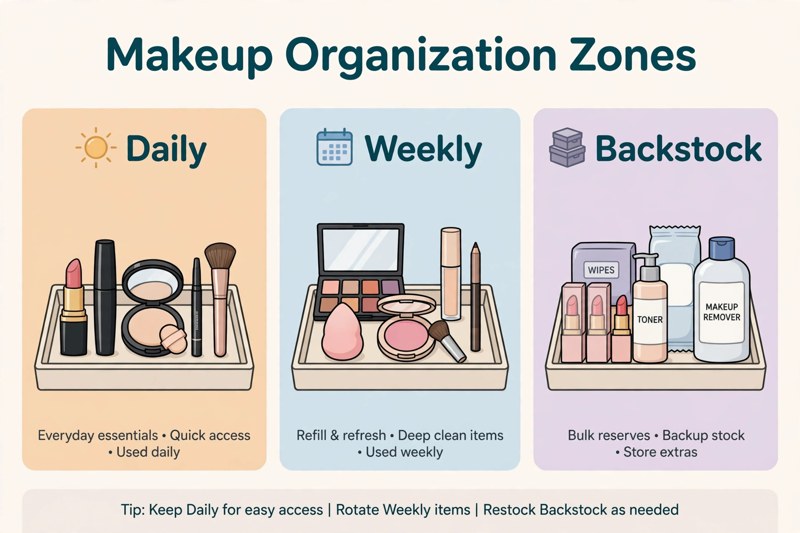
Zones are the whole system in one idea: where a product lives should match how often you touch it, not how pretty it looks. Three zones cover almost every collection.
- Daily zone. The products you use most mornings, such as foundation or tinted moisturiser, concealer, mascara, brow product, blush and one lip product, plus the brushes or sponge for them. This zone lives in the easiest spot you have: the front of a drawer, a small tray on the counter, or a caddy you carry to the mirror. Keep it within easy reach for you.
- Weekly zone. Products you use a few times a week: extra eyeshadow palettes, a bolder lipstick, bronzer, setting spray, a lash curler. These sit just behind or beside the daily zone, easy to grab but never in the way of the morning routine.
- Backstock zone. Backups, seasonal shades and occasion-only products. This zone can live somewhere less convenient, such as a labelled bin or bags for cosmetics in a closet, on a shelf, or in an under-sink cabinet. You visit it only when a daily product runs out or the season changes, which is why it should not compete for drawer space.
| Zone | What goes here | Where it lives |
|---|---|---|
| Daily | The 5 to 10 products you use most mornings | Front of drawer or small counter tray |
| Weekly | Products used a few times a week | Behind the daily zone, same drawer or a second tray |
| Backstock | Backups, seasonal and occasion-only products | Labelled bin, bags for cosmetics, closet shelf or under-sink cabinet |
For a closer look at how a daily tray connects to your morning routine, see our skin prep guide, which explains the order those products are actually used in.
Group Makeup by Product Type and Frequency
Inside each zone, group by product type first and frequency second. Face products together, cheeks together, eyes together, lips together, tools together. That sounds obvious, but it stops the daily scramble: when everything of one type lives in one place, you stop opening three drawers for one look. Organizing makeup this way is faster than sorting by colour or by brand.
Within each type, put the most-used item at the front. Your everyday foundation goes in front of the occasional one. Your everyday mascara sits where your hand lands first, and the coloured mascara you wear twice a year sits at the back. Category tells you where to look, and frequency tells you how far to reach.
One rule keeps groups from collapsing into each other: one product, one home. A lipstick that lives in two places lives in no place, because you will never remember which one you checked.
Choose Makeup Organizers After Measuring
This is the step most guides put first, and it is why most systems fail. Measure first and shop second. Write down the usable internal width, depth and clearance height of your drawer, including runners and any obstructions, and the footprint of the counter or shelf. Makeup organizers that almost fit are worse than none at all, because they slide, waste space and make the drawer feel broken.
Organizing Makeup Drawer Space
Organizing makeup drawer space starts with matching the organizer to the drawer, not the other way round:
- Shallow drawers: low trays and small divided sections. Tall bottles will not fit here, so keep them upright elsewhere.
- Deep drawers: adjustable dividers that split the drawer into lanes, or stacked trays with daily items on top and backups underneath.
Which Cosmetic Organizer Fits Which Space
A makeup organizer should fit your measured space and your habits. A cosmetic organizer is only useful if you will actually put things back in it.
- Counters: one small tray for the daily zone, not a display of the whole collection. A tray has an edge, and that edge is what stops the counter creeping back into clutter.
- No drawer at all: a rolling cart, a carry caddy or wall shelves. The storage does not have to be a drawer. It has to be a defined place with a boundary.
- Closet or shelf: lidded bins or zipped bags for backstock.
Start With What You Already Own
Small boxes, jars, a spice rack for bottles and a letter holder for palettes all work. Buy only to fill a gap you have measured, and choose clear containers where you can, because seeing every item from above helps stop duplicate buying.
Makeup Bags: Daily Carry, Backstock and Travel
Drawers hold your collection. Makeup bags keep a small, ready set together and move it between rooms. Whether you call them makeup bags or make up bags, the job is the same: protect products and keep them where you can find them.
Choosing Makeup Bags and Bags for Cosmetics
Match the bag to its job:
- A small zip pouch for a daily touch-up kit.
- A larger lidded or zipped bag for seasonal shades and backups. These bags for cosmetics keep the backstock zone together and easy to move.
- A clear pouch when you want to see everything at a glance.
- A wipeable lining, so spills and powder fallout are easy to clean.
Where the bag lives matters too. The AAD advises keeping cosmetics in a dry, clean space at room temperature and out of direct sunlight, and putting caps and lids on securely after each use. That means makeup bags should not sit on a sunny windowsill or in a hot parked car.
Organizing Makeup Bag Contents
Organizing makeup bag contents works best when the bag holds a touch-up kit, not your whole collection:
- Keep one lip product, concealer, a small powder or blotting product, and a tiny brush or sponge you can keep clean.
- Use the same “one product, one home” rule: if it lives in your bag, it does not also live in the drawer.
- Empty and wipe the bag regularly, and wash fabric bags according to their care label.
- Check the contents each time you reset your drawer, and remove anything old or changed in smell, colour or texture.
Using a Makeup Bag Organizer in a Tote
If you carry a tote or large bag, a makeup bag organizer is a fabric insert with pockets that keeps a pouch from sinking to the bottom. It works best when it holds only the touch-up kit and stands upright, so products do not roll around and leak.
Makeup Brush Zone
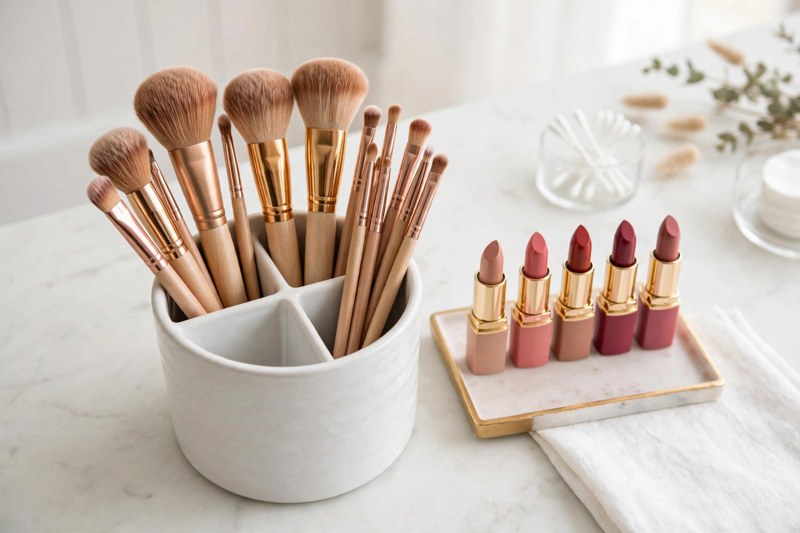
Brushes fail in shared storage. Tossed loose in a drawer, bristles bend, pick up powder fallout and get lost under palettes. Give brushes their own zone, separate from bottles and compacts, and keep them clean and dry.
The AAD recommends washing makeup brushes every 7 to 10 days and cleaning sponges after every use. After washing, lay brushes flat to dry with the tips hanging off the edge of a counter, and store them only once they are fully dry.
- On a counter or vanity: stand clean, dry brushes bristles-up in a cup or divided holder, with face brushes in one section and eye brushes in another.
- In a drawer: lay brushes flat in a shallow tray or a brush roll, with a divider between them and everything else.
- For travel or shared bathrooms: a zippered brush roll or pouch keeps bristles protected. Do not zip up damp brushes, because they can pick up a musty smell.
Keep a small container nearby for tools that need cleaning, so dirty brushes never drift back into the clean set. Never share brushes.
Palette and Lip Product Zones
Palettes and lip products cause most of the visual mess because they are flat, wide or small enough to slide anywhere.
Palettes. Stand sturdy palettes upright like files, using a slim divider, a small file sorter or a letter holder. Stacked flat, the bottom palettes disappear from your routine, but standing up, every shade range is visible. For small, fragile or mixed-size palettes, use a shallow divided tray instead. Keep daily or weekly palettes at the front and backstock palettes behind them.
Lip products. Stand lipsticks upright with the colour end up, or lay them in a narrow tray in shade order, from nude to bold. Either way, you should be able to see every shade without opening a tube. Lip liners and glosses go in a slim section of their own, because thin items are the first to vanish into drawer corners.
If a palette or lipstick has not been reached for in months, even when it is standing where you can see it, that is useful information. It belongs in backstock, not in a visible daily slot.
Keep the Counter Clear
A clear counter is not a decorating choice. It is what makes the rest of the system survive. Counters fill up because they are the easiest place to set something down, so the rule has to be equally easy: only the daily tray stays out, and everything else goes back after use. Not later, not tonight.
Bathrooms are often warm and humid, and the AAD recommends storing makeup in a dry space. In a small or humid bathroom, keep only frequently used items out, inside their tray, and store the rest outside the bathroom.
A few practical helps:
- Keep wipes or a cloth in the nearest drawer so the counter can be wiped in seconds.
- Keep the tray small enough that it cannot hold extras.
- If you share the space, give each person their own tray or labelled bin.
That habit is the unglamorous half of how to organize makeup, and it matters more than any container.
Build a 60-Second Reset
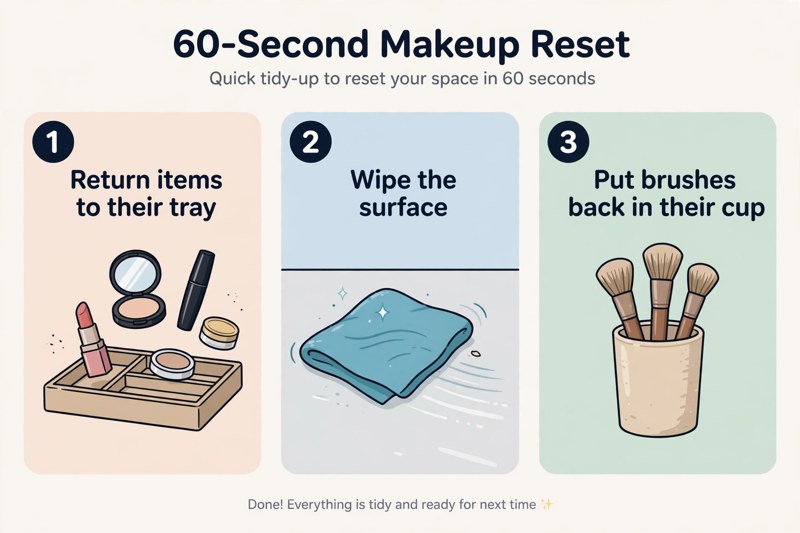
No system survives without a reset, and no reset survives if it takes longer than a minute. Build one that fits between finishing your makeup and leaving the room:
- Return (20 seconds). Put every product back in its zone: daily items in the tray, weekly items behind them, tools in the brush cup.
- Wipe (20 seconds). Wipe the tray and the counter edge. Powder and spills build up fast.
- Scan (20 seconds). Look for strays, such as a lipstick on the sink edge, a brush on the towel, or a cap off a bottle. Fix them now, while you still remember where they belong.
If the reset starts taking longer than a minute, that is a signal, not a failure. Something has crept into the daily zone that belongs in weekly or backstock.
Expiration and Inventory
An organized drawer full of old products is not organized at all. The AAD says to keep track of when you open each product. Check the packaging for the open-jar symbol, a small open jar with a number and the letter M, such as 12M, which shows how many months the product should last after opening. It is not required on cosmetics in the US, so many products will not carry one. Where it is missing, use the opening date and the product’s condition.
Keep a simple inventory: a note on your phone, or the opening date written on the base of each container with a marker. Anything past its suggested window, or changed in smell, colour, texture or performance, goes in the discard pile. Mascara deserves the strictest eye, because it is used near the eyes. The AAD advises replacing it after three months.
Inventory also stops duplicate buying. Before buying a new nude lipstick, check the lip zone: if three near-identical shades are already there, the new one is a duplicate, not a gap. One in, one out keeps the zones honest.
Maintenance Schedule
A maintenance schedule turns a one-afternoon project into a system that still works in six months. Keep it small enough to actually do:
- Daily: the 60-second reset.
- Weekly: a five-minute check. Wipe one tray, return strays, and move anything that has become a daily habit into the daily zone.
- Monthly: a ten-minute sweep. Check for empty or damaged products, wipe all trays, and confirm the daily zone still holds only what you use most mornings.
- Every few months: a seasonal review. Rotate seasonal shades in and out of backstock, check opening dates and open-jar symbols, and discard anything past its window.
Organizing makeup once matters less than keeping the system matched to your real routine as it changes. Routines change with seasons, jobs and habits, and a system that does not change with them is one you will quietly abandon. When the zones stop matching your mornings, adjust the zones, not your expectations of yourself.
Frequently Asked Questions
Conclusion
A tidy drawer is not the goal. A faster, calmer morning is. Declutter first, build daily, weekly and backstock zones, group by type and frequency, measure before buying storage, give your makeup bags and brushes their own homes, and protect it all with a 60-second reset and a light seasonal review. That is how to organize makeup in a way that survives real life, not just the afternoon you set it up. Organizing makeup is a habit, not a one-time project, and the smallest version of it, a clear counter and a one-minute reset, is the one that lasts.
References
American Academy of Dermatology, “How to clean your makeup brushes”: https://www.aad.org/public/everyday-care/skin-care-secrets/routine/clean-your-makeup-brushes
American Academy of Dermatology, “When to toss your makeup and sunscreen”: https://www.aad.org/public/everyday-care/skin-care-secrets/prevent-skin-problems/replace-makeup-sunscreen
